Pages

Friday, December 27, 2013

Organize Christmas Decorations

Hope everyone had a great Christmas!  We had a wonderful time with family, and the kids were excited to see that Santa didn't place them on the "naughty list" this year.  Unfortunately, I always dread the time to put the Christmas decorations back in the attic.  And every year I say that I am going to organize it better.  Well here is one organization tip on what to do with those Christmas lights.

   Good Housekeeping

Wrap those lights around a coffee can.   Then cut a little spot at the top and stick the plug through.  Very simple and keeps all my lights from getting tangled.  

Check out more great holiday storage ideas from our friends at Good Housekeeping   http://Goodho.us/6266dwnQ 


Sunday, November 10, 2013

Give Thanks

Thanksgiving Fall Wreaths


Thanksgiving is a time to think about all the little things that make life great!  Family and friends, loving pets, good health, yummy food, beautiful crafts and good times! 
If you feel those creative juices flowing, check out these paper made wreaths.  

 by Martha Stewart
by Corner House
 by Lia Griffith
by Wayfair.com


Click each link for directions on how to make these beautiful wreaths. 

Happy Thanksgiving!


Tuesday, October 29, 2013

DIY Kids Halloween Costumes


Few days left before Trick or Treat time.  Here are some DIY costumes you could whip up for those last minute ideas.  Thanks to the DIY Network for all the inspiration.  To learn how to make these great costumes go to DIY Network.  Let us know how it turned out!  


Thursday, October 17, 2013

Halloween Party Treats

I have been contemplating on whether we are going to have a Halloween Party for the kids this year.  So during all this deciding, I did my homework on some cool new Halloween treats.  Of course you have the typical "spider cupcakes" etc.  I was looking for something with ingredients that most kids would enjoy.  You can't usually go wrong with either M & M's or any type of chocolate candy bars.  

Here are a few ideas that I found.  Easy, and fun to make!


Snickety Whip


by www.brightideas.com


Ingredients

  • 6 SNICKERS® Bars
  • 3 Bananas
  • 1 Tub of whipped topping

Directions

  • 1. Slice all SNICKERS® Bars into small pieces
  • 2. Slice all bananas into small pieces
  • 3. Combine whipped topping, SNICKERS®, and bananas into a large mixing bowl. Stir and serve


Scary Ghost Cookies

by www.brightideas.com


Ingredients

  • 3½ cups chopped TWIX® Cookie Bars
  • 10 pieces graham crackers
  • 3/4 cup peanut butter, reduced fat
  • 1/3 cup confectioner’s sugar
  • 1 ½ cups prepared vanilla frosting
  • ¼ cup mini M&M’S® Brand Chocolate Candies
  • Ground chocolate cookies, optional
  • Wax paper
  • Sheet pan
  • Wire rack
  • Food processor

Directions

  • 1. In a food processor or blender, pulse TWIX® Cookie Bars with graham crackers until fine.
  • 2. Remove the mixture and put it in a bowl. Add the peanut butter and confectioner’s sugar to the bowl and blend together.
  • 3. Divide the mixture into 16 pieces. Shape each piece into a ghost. If too sticky, add extra confectioner’s sugar as necessary. Place the ghosts onto the wax paper and refrigerate for 30 minutes.
  • 4. Heat the frosting in the microwave for approximately 10-20 seconds, until thinned and looking slightly like whipped cream. Place the ghosts on a wire rack over a sheet pan lined with waxed paper. Spoon the heated frosting over the ghosts until completely coated. If the unused frosting begins firming up, simply reheat it for 5 to 10 seconds. Place 2 M&M’S® Brand Chocolate Candies on each ghost for the eyes.
  • 5. Sprinkle the ground chocolate cookies on a plate like it is "dirt" if you want. Nestle the ghosts in the "dirt".


Harvest Apples


by www.brightideas.com


Ingredients

  • 12 small apples, washed and patted dry
  • 1 bag soft caramels
  • 2 tablespoons water
  • 36 pieces SNICKERS® Brand Miniatures, roughly chopped
  • 12 craft sticks
  • Cookie Sheet
  • Reynolds® Parchment Paper

Directions

  • 1. Press the craft sticks into the tops of the apples.
  • 2. Melt the caramels with water in a 4-cup, heat-safe glass measuring cup for 1 - 2 minutes in the microwave. Stir occasionally until smooth.
  • 3. Dip the apples into the caramel, rolling each apple to cover. Immediately roll in the chopped SNICKERS® Brand Miniatures. Set on a cookie sheet lined with Reynolds® Parchment Paper. Refrigerate for 10 minutes.


Vampire Bites

by www.brightideas.com


Ingredients

  • 1 ½ cups flour
  • ¾ teaspoon baking soda
  • ½ teaspoon cinnamon
  • ½ cup butter, softened
  • ½ cup packed brown sugar
  • 1 egg
  • Red food coloring
  • ¼ cup red decorator’s sugar
  • 24 pieces MILKY WAY® Minis
  • 1 tube vanilla frosting
  • Plastic wrap
  • Electric mixer
  • Large bowl
  • Medium bowl
  • 2 cookie sheet pans

Directions

  • 1. Combine the flour, baking soda and cinnamon in a medium bowl. Set aside.
  • 2. Beat the butter and sugar in a large bowl with an electric mixer until light and fluffy. Add the egg; beat well. Slowly add the flour mixture into the dough until blended. Add enough food coloring to tint the dough a bright red. Cover the bowl with plastic wrap, and refrigerate at least 2 hours.
  • 3. Preheat oven to 375°F. Line the cookie sheet pans with the parchment paper.
  • 4. Using a rolling pin, roll out the dough on a lightly floured surface to 1/4-inch thickness. Use a cookie cutter to cut out 24 lip shapes. Otherwise, you can form the dough into 24 balls and flatten each slightly to create free-form shaped lips using your hands to pinch and shape the dough. Transfer these to the prepared cookie sheets. Re-roll the scraps if necessary.
  • 5. Sprinkle the cookies with red sugar. Bake 7-10 minutes, or until golden brown. Remove from the oven, and immediately press a MILKY WAY® Minis into the center of each cookie. Cool completely. Use vanilla frosting to pipe fangs over the candy.
  • Tip: If short on time, consider using store-bought refrigerated sugar cookie dough. Begin by kneading 2/3 cup of flour into the dough, then roll and cut according to the above directions. One roll of cookie dough makes approximately 18 cookies.


Enjoy!


Monday, October 7, 2013

Scrapbooking Retreats Florida 2014


We have some great news for the upcoming 2014 year! 

Scraptabulous Getaways is growing, so we have added More Scrapbook Crops, More locations for our retreats, and More Space!

Lets face it.  Anyone who has ever been to a Scrapbook Retreat knows you have so much Stuff, to bring.  So we are adding more space for all our guests!  More room to move around, have enough space for our chairs, and more room for all our STUFF!

Just remember space is still limited and fills up fast.  Pre-register at our website www.scraptabulousgetaways.com .  If you are booking a room at the Hotel to stay, the earlier the better for the best rate. 

Looking forward to a great 2014!  Hope to see all our friends and meet new friends in the upcoming year.  

So lets get SCRAPTABULOUS !


Friday, October 4, 2013

Rubber Stamp Cleaner


After some serious research and trying different combinations, I have finally found a wonderful homemade rubber stamp cleaner. 

Using quite a few of the store bought cleaners, I had decided to try to find something a little less expensive and that would last longer.  Lets face it, I use a lot of ink, and different colors, and those roll on cleaners just were not cutting it anymore. 

So I have decided to share my combination with all my friends. Now, I have tested this out for a few months and I love it! The ink just seems to run right off and it does not dry out your rubber stamps either.  


What you'll need. 

1.  Simple Green.  You will most likely find this at Ace Hardware, or a Auto Part Store. 

2.  Pure Glycerin.  Walgreens, and CVS carry this in the beauty section.  Just make sure it is 100% Glycerin.  It is a clear, oily liquid. 

3.  Any spray bottle.

4.  A cleaning pad.  I used "Scotch Brite Dobie"  It will last a long time when scrubbing your stamps.  You can also find these at Ace Hardware, or the Dollar Store. 

5.  Distilled water. 

After you gather all your ingredients, add a 1:1 ratio of the Simple Green and distilled water into your spray bottle.  You then add two tablespoons of the pure glycerin and shake well.  The glycerin is what protects your rubber stamps from drying out. 


When applying the solution to your stamps, just spray, then dab excess off onto a paper towel.  You may have to do this a few times depending on how much ink is on the stamp.  Then using your cleaning pad, scrub the stamp a few times to reach in between the groves, spray a little more solution, then wipe clean. 

Voila! Clean Stamps. 


Halloween Wreath

Check out this great tutorial from our friends at The 36th Avenue on making a Halloween Wreath.  So pretty, yet still got that spooky look!


Create and Enjoy!

Thursday, October 3, 2013

DIY Projects


DIY Project

Back to school routines can get a little hectic.  So to make things go a little smoother and teach my kids how to be responsible, I tried this great DIY clipboard routines project.  Thanks to the 36th Avenue for showing us step by step on how to create this easy routines chart.


Click link for step by step instructions


Orlando, FL Scrapbook Crop

We have finally found the perfect spot to hold our Scrapbook Crop in Orlando.  By popular demand, there are a lot of scrapbookers, stamping and card making creativity going on in Orlando, Florida so we have been searching relentlessly for that perfect location.  Beginning in 2014 we will hold our first Saturday Crop in the Orlando, Altamonte area.  This is a beautiful brand new Hampton Inn. 

We are looking forward to meeting all our Orlando Scrapbookers, stay posted for when registration opens on our website www.scraptabulousgetaways.com  Don't forget to sign up for our email newsletters or like us on facebook to get regular updates on all future events.


Saturday, September 21, 2013

Halloween Treats


Funny Bones Cupcakes

What you'll need

  • Chocolate-frosted cupcakes
  • Mini marshmallows
  • Black decorators' gel
  • White icing
  • Icing bag fitted with a small round tip

How to make it

  1. Start with a batch of chocolate-frosted cupcakes. Top each with a mini marshmallow head, using black decorators' gel to create eyes and a mouth.
  2. Use an icing bag fitted with a small round tip to pipe on a stick figure, adding a couple of short horizontal lines for ribs.

Crop Till You Drop

We are having a wonderful time here at our Crop Till You Drop Scrapbooking Retreat this weekend.  Lots of games, prizes and raffles.  We have 30 more hours to go and I'm sure by the end of tonight we will be laughing hysterically due to lack of sleep.  My non scrapbooking friends, always ask why we don't get much sleep at our retreats, but only a true Scrapaholic could understand. 

Lots of upcoming events for 2014.  We are excited to start off the new year with our January Weekend Retreat, Tick Tock and Ya Don't Stop.  Pre register at our website www.scraptabulousgetaways.com.  


scraptabulousgetaways.com


Thursday, August 22, 2013

Scrapbooking Organized


SPICE RACK TURNED GLITTER /EMBOSSING RACK


scraptabulousgetaways.com

I love to reuse, or upcycle items that we just don't really use for its original purpose anymore.  This is an old spice rack that my good friend really never used.  Half of them were empty and she just wasn't using it to its full potential.  However, like me, she is addicted to scrapbooking.  So she decided to create this wonderful glitter/embossing powder rack.  

I am constantly looking around the house, wondering what I could repurpose and put to a good use.  You could also shop around thrift stores and find a treasure.  The possibilities are endless. 

Old T-shirts made into scarfs. Mason jars as candle holders. Old small bookcases for shoe racks. Door knobs as hooks to hang items. Bottles used as vases.  Glass jars made into photo frames.  The list goes on and on.  

So go ahead and get creative!

Wednesday, July 31, 2013

How to Stain Already Finished Furniture

Well, I have been working on my "new" craft room for the last four months.  I started out having trouble with what type of decor to use without breaking the bank. So the best option was to use what I already had and just make it my "own" style. 

Before

scraptabulousgetaways.com
This is a bookshelf that my Dad made out of pine about 20 years ago.  It had been stained the cherry oak color and just didn't go with my "new" craft room vision.  I didn't want to get rid of this beautiful piece so I did the next best thing. 


I had great results using MinWax Poly Shades colored stain.  It is thin and sheer.  It won't look thick and heavy on your furniture like paint sometimes does.  It is color and polyurethane all in one which will give you a durable finish.  It does take time to cure, a few days or a week depending on the piece. 

All you need is to take fine grit sandpaper over the surface quickly to roughen it up a bit. It doesn't take much. Then wipe off with a tack cloth.

I do recommend using a high quality foam brush for application.  I used one made by Wooster.  It gave me a nice even finish.  Make sure you stir the stain well before you begin.  Dip the tip of your brush in the can and start from the center of your piece working your way out to the edges with long even strokes.  Don't apply too heavy.  2-3 coats are better than 1 thick one.

Tip:  Since this furniture piece already had a stain finish.  You may get a spotting.  Don't panic!  Let it dry, then go over it with the fine grit sandpaper and wipe clean.  Apply another light coat and let dry. It will be gone.

scraptabulousgetaways.com


Another good tip for if your painting any furniture a dark color.  Make sure you have a good light source so you can wipe any drips as they occur. 


The finished result.........Beautiful.


After


scraptabulousgetaways.com

b


Monday, July 15, 2013

Scrapbooking Embellishment Stand


Well it is already mid July and I am still working on organizing my "new" scrapbook room. 

My current project I wanted to share is my embellishment stand. This is for the thrifty shoppers and those who love new and creative ideas. 

You can change, create and add on anyway you like.  That's what makes it unique.  So come on and get those creative juices flowing. You never know what you may come up with.

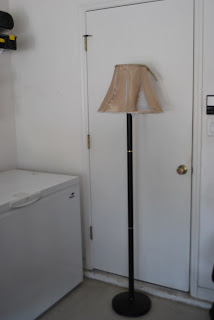
First, I started out with an old halogen floor lamp and took the top piece off.  It was already painted black, so I just kept the base the same.

scraptabulousgetaways.com


Secondly, I went to my local SPCA thrift store and found me a nice sturdy lamp shade.  I wanted one that flared out at the bottom to give it a little more shape.  I then stripped every piece of fabric and excess glue off of the shade.


scraptabulousgetaways.com

scraptabulousgetaways.com


I then used some Rust-Oleum spray paint for metal to coat over the lamp shade.  After attaching the shade to the lamp base, just use some clips (I used shower curtain clips) for hanging any embellishments you desire.  Including stickers, borders, vellum pads, etc.


Voila! Your scrapbooking/craft embellishment stand. Which has helped me tremendously in being able to find things for my layouts and projects.  Cause lets face it, being and staying organized is a challenge. 


Saturday, March 16, 2013

Addicted to Scrapbooking

scraptabulousgetaways.com
Welcome to our new Addicted to Scrapbooking Blog!  So all you Scrapbooking Fanatics come join us to share cool and new ideas and techniques.  http://www.scraptabulousgetaways.com