Post Feed

Wednesday, July 31, 2013

How to Stain Already Finished Furniture

Well, I have been working on my "new" craft room for the last four months.  I started out having trouble with what type of decor to use without breaking the bank. So the best option was to use what I already had and just make it my "own" style. 

Before

scraptabulousgetaways.com
This is a bookshelf that my Dad made out of pine about 20 years ago.  It had been stained the cherry oak color and just didn't go with my "new" craft room vision.  I didn't want to get rid of this beautiful piece so I did the next best thing. 


I had great results using MinWax Poly Shades colored stain.  It is thin and sheer.  It won't look thick and heavy on your furniture like paint sometimes does.  It is color and polyurethane all in one which will give you a durable finish.  It does take time to cure, a few days or a week depending on the piece. 

All you need is to take fine grit sandpaper over the surface quickly to roughen it up a bit. It doesn't take much. Then wipe off with a tack cloth.

I do recommend using a high quality foam brush for application.  I used one made by Wooster.  It gave me a nice even finish.  Make sure you stir the stain well before you begin.  Dip the tip of your brush in the can and start from the center of your piece working your way out to the edges with long even strokes.  Don't apply too heavy.  2-3 coats are better than 1 thick one.

Tip:  Since this furniture piece already had a stain finish.  You may get a spotting.  Don't panic!  Let it dry, then go over it with the fine grit sandpaper and wipe clean.  Apply another light coat and let dry. It will be gone.

scraptabulousgetaways.com


Another good tip for if your painting any furniture a dark color.  Make sure you have a good light source so you can wipe any drips as they occur. 


The finished result.........Beautiful.


After


scraptabulousgetaways.com

b


Monday, July 15, 2013

Scrapbooking Embellishment Stand


Well it is already mid July and I am still working on organizing my "new" scrapbook room. 

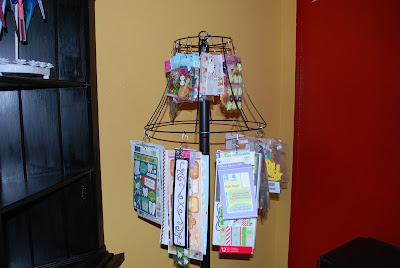
My current project I wanted to share is my embellishment stand. This is for the thrifty shoppers and those who love new and creative ideas. 

You can change, create and add on anyway you like.  That's what makes it unique.  So come on and get those creative juices flowing. You never know what you may come up with.

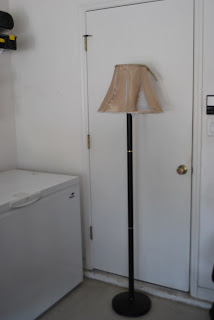
First, I started out with an old halogen floor lamp and took the top piece off.  It was already painted black, so I just kept the base the same.

scraptabulousgetaways.com


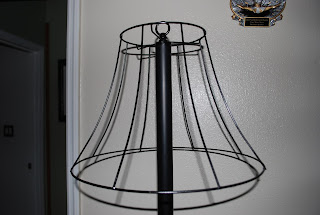
Secondly, I went to my local SPCA thrift store and found me a nice sturdy lamp shade.  I wanted one that flared out at the bottom to give it a little more shape.  I then stripped every piece of fabric and excess glue off of the shade.


scraptabulousgetaways.com

scraptabulousgetaways.com


I then used some Rust-Oleum spray paint for metal to coat over the lamp shade.  After attaching the shade to the lamp base, just use some clips (I used shower curtain clips) for hanging any embellishments you desire.  Including stickers, borders, vellum pads, etc.


Voila! Your scrapbooking/craft embellishment stand. Which has helped me tremendously in being able to find things for my layouts and projects.  Cause lets face it, being and staying organized is a challenge.